Jenkins is one of the most famous automation servers in the market. In this series, we will explore Jenkins by integrating it with some monitoring and deployment tools.
To learn about Jenkins, let's quickly spin up an ec2 instance as we don't like to mess up with our system 🫡.
Jenkins installation
Step 1: Creating an EC2 instance.

Make sure you have enough resources to host Jenkins by checking the resource requirements here.
Step 2: SSH into our instance and then our basic rituals. Updating the system packages and installing OpenJDK 17.
#updating system packages
sudo apt-get update -y & sudo apt-get upgrade -y

#installing openjdk-17
sudo apt update
sudo apt install fontconfig openjdk-17-jre
java -version
openjdk version "17.0.8" 2023-07-18
OpenJDK Runtime Environment (build 17.0.8+7-Debian-1deb12u1)
OpenJDK 64-Bit Server VM (build 17.0.8+7-Debian-1deb12u1, mixed mode, sharing)
Step 3: Check the status of the Jenkins server. Copy the admin password as well.
sudo systemctl status jenkins
You will get output something like this:

Step 4: Go to the inbound rules of your ec2 instance and enable port 8080 for Jenkins.

Jenkins will be available on publicIP:8080, enter the admin password, and click install suggested plugins.
If you do not get Jenkins on a public ip, try doing SSH tunneling.
After the plugins are installed, create your first admin user.

Click Save and Finish.

We have successfully installed Jenkins.
Creating Jenkins pipeline using default UI.
We will deploy projects in upcoming blogs, for now, we will be creating a simple hello world pipeline.
Step 1: Click on the new item.

Step 2: Name your pipeline, and choose pipeline.

Click OK.
Step 3: Scroll down and you will see the Pipeline script. Click on Try Sample Pipeline and select Hello World.

Click Save.
Step 4: Now you will be redirected to Dashboard > My first pipeline.
Click on build now.

If you click on logs, you will get

This is how we set up basic pipeline using the default UI for Jenkins.
Blueocean plugin install and basic pipeline setup.
Blue Ocean as it stands provides easy-to-use Pipeline visualization. It was intended to be a rethink of the Jenkins user experience.
Step 1: On the dashboard click on Manage Jenkins > Plugins > Available plugins.


Install the blueocean core plugin and restart jenkins.
After installation at the end, you will see a checkbox to restart Jenkins.
Now, if your jenkins has been successfully restarted, log in with your credentials.
On your dashboard now you will see an option to Open Blue Ocean.

Which will look like the below UI, Click on Create New Pipeline.

Choose your provider. Create your GitHub access token using the given link and put it over there.

This one is not recommended for production use, but check all the boxes for now and generate the token.

Then click on Generate token

Now you can see the token there, which looks something like

Experts don't worry, I deleted the token after the blog was finished 🫡.
Put the token into the Jenkins pipeline and select the repo you want to create the pipeline with.

then click Create pipeline. I have the Jenkinsfile in my project.
You can take a look at the project.
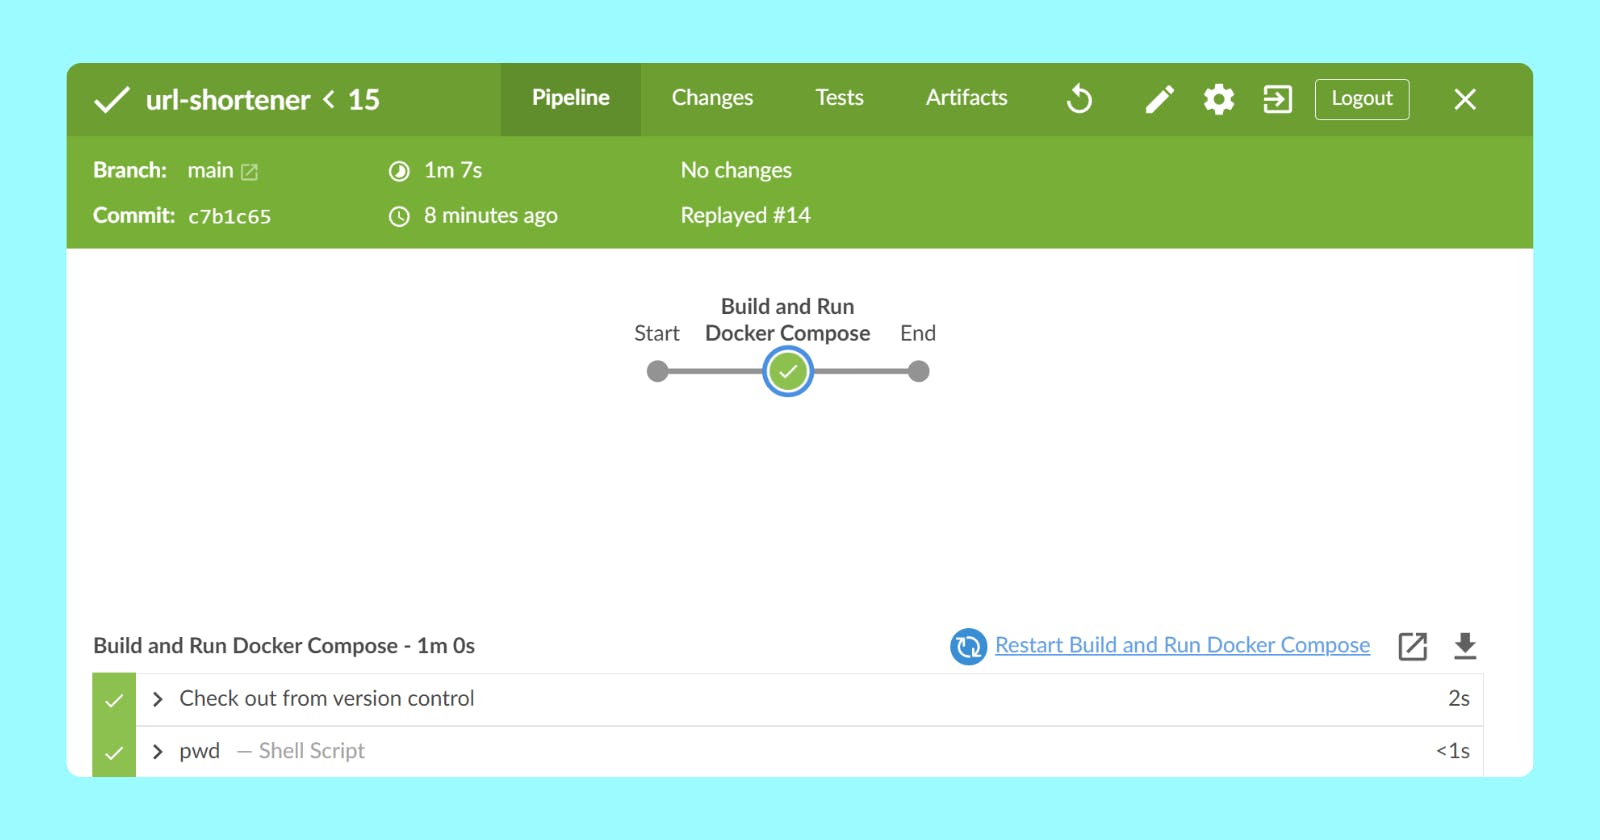
The pipeline is created as

We clicked save and the pipeline started building

And and pipeline goes like this.

Don't freak out if your pipeline doesn't work. Just try to understand the basic flow, we will learn more about this later in our series.
We have seen a demo on how to create a pipeline using blue ocean UI in Jenkins.
Thank you, you guys stay awesome.
